Sunday, September 23, 2018

How to Create Stained Glass


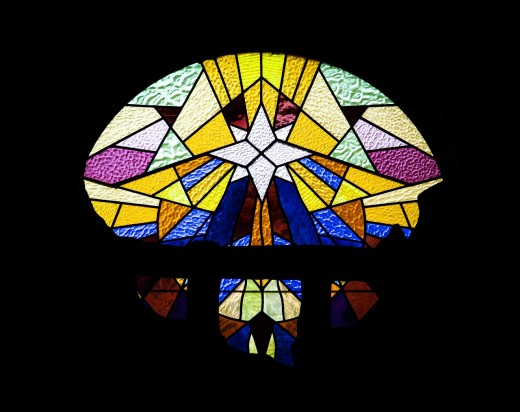
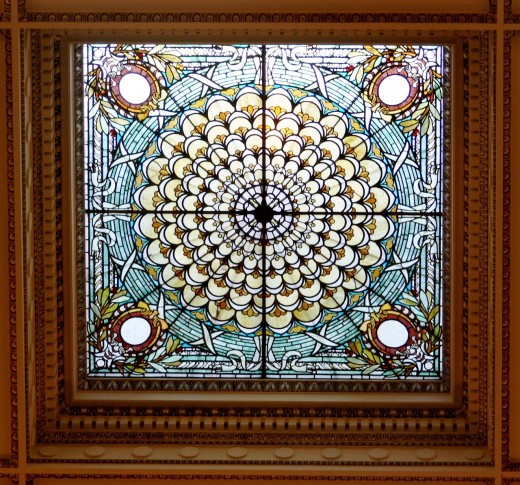
Rose and Skyline Stained Glass - Portland, Oregon 


Between the twelfth and the fifteenth century, craftsmen created some of the most outstanding work in stained glass. Stained glass gave the medieval Church a compelling and dramatic way of communicating with the people through church and cathedral windows. But after this period, the directedness and richness of stained glass work began to be lost as the designs became too elaborate and were often just over-detailed copies of paintings. Today we are much more in sympathy with the style of the earlier craftsmen with its emphasis on strong simple shapes.
The techniques described in this hub are the basic ones needed for most forms of leaded stained glass work. A panel to hang in a window, or even a whole replacement windowpane, is probably the simplest piece of leaded stained glass work for a beginner, with reasonable standards of care and accuracy, to tackle.
Lampshades and lanterns, because of their more complicated structure require more skill. However, they still use the same basic processes that are described here and could soon be undertaken after practice.

How the Glass is Colored

Many people believe that the stained glass artist puts color on the glass. This is not so; color is incorporated into the glass as it is made. Glass is a combination of silica, soda, lime and oxides that are fused in a furnace with the mineral that produces the color. Cobalt makes blue, uranium or copper creates green, cadmium, copper or even gold will produce red. When the ingredients are melted, the glassblower gathers some on the end of a pipe and blows it into a cylindrical shape. This is then cut open and spread into a flat sheet. Because glass is made in this way there are varying thickness, bubbles, streaks and an infinite variety of color tones. This variety gives you great scope in your stained glass design and makes every piece of work unique.

Principles of Design

The first important point to remember when beginning to choose colored glass for a design of stained glass work is the way the quality of the color is changed enormously by the light that shines through. Remember, too, that the interior of a room, in much the same way as the interior of a cathedral, is basically dark and the contrast with bright daylight is therefore very strong. This contrast is made even greater by the darkness of the lead strips that outline and hold each section of glass. What this means in practice is that you should choose glass literally twice as dark as you initially think is right because the light shining through will tone the color down so much.

Different from Painting!

Forget the way you judge colors in painting. Color relationships in glass are very different. Light, surprisingly makes blue come forward and red recede. And these same colors, if placed together, do not stand out clearly from each other but both take on a purple tone. So experiment all the time, holding the glass up to the daylight to learn how to choose and combine colors for your designs.
Another obvious distinction between painting and glasswork is that, as glass is hard and has to be cut, it is always clearly distinguished from the next piece, there is no blurring or merging of colors as in painting.
It is useful to know the rules for heraldic design, made so that identification was easy at a distance on a battlefield, because they are often applied to glass design. Colors are placed next to metal and not next to each other. In glass terms, white and yellow are the silver and gold of heraldry and they are placed next to strong colors for contrast.

Strong Simple Shapes

Let’s say you are going to make a straightforward leaded glass panel. You will have bought a selection of glass from a stained glass workshop or craft store, both quarter sheets and mixed smaller pieces are available. Bear your selection of glass in mind and begin by making a full-sized color design sketch. Keep it simple, limit your colors, but use pieces in a variety of sizes. Remember the effect of the network of dark leading, which will be the strong designs lines in your panel.

Making the ‘Cutline’

When you are satisfied, trace the lines of the design carefully, including the outside edges. This tracing paper becomes your ‘cutline’ and all the glass is cut to fit it. The lines on the tracing should be about 1/16” thick. The cutline is then put down flat and the pieces of glass placed down on it in turn to be cut to size.

Cutting Technique

If you have not cut glass before, practice first. You will be able to buy the right kind of single wheel glasscutter and replacement wheels from your craft store. Hold the glasscutter upright, as shown in the figure on the right., placing it between the first and second fingers with the thumb supporting the hammer edge. Score the surface of the glass firmly in an even continuous line flowing along the edge of your tracing line. (The thickness of the line represents the middle of the lead.) Move either towards or away from you, whichever feels right, but do not go backwards and forwards on the same line or the break will not be clean and you will blunt the wheel. With the hammer side of the cutter tap along the score line on the back of the glass till it breaks. Snip off any rough pieces or slivers with pliers.

Color Testing

You will want to continue testing the colors against the light as you cut the pieces because you may decide to make adjustments. The best way to do this is to take a plain sheet of glass. Paint in black lines, 1/4” thick on the back following the exact pattern of the cutline. These painted lines will represent the whole width of the leads. Prop the glass up against the light and stick the glass pieces up in position as you cut them with blobs of modeling clay so that you can study the effect.

Painting on the Glass

This is the stage at which you can paint on to the glass pieces if you want that effect, and you have an enameling kiln. Painted shading or detail can emphasize design and modify the light that comes through the glass. The special stained glass paint comes in browns, grays and black, the intention is not to color. It is in powder form and you mix it with diluted gum Arabic, using a palette knife on a piece of ground glass. Paint on the glass sections with a soft brush; hold your work up to the light to judge the effect.

Firing in the Kiln

When dry put the pieces, with space between them, on a kiln shelf which has been covered with a smooth layer of dry plaster. Place in the kiln and bring the heat up slowly to about 9.752°F. The paint should then appear almost glossy. Turn the kiln off and leave the glass to cool.

The Leading Process

You are now ready to fit your glass together, rather like a jigsaw. Each piece is slotted into a lead strip, know professionally as a ‘came’. It comes in 1/2” and 1/4” sized and is H-shaped in construction so that glass fits in on both sides.
Lead is soft enough to be bent around the curves so that joints are only necessary at the angles and where new sections as added. (All these joints will eventually be soldered together.)

Prepare the Lead Cames

You must first prepare your lead came by stretching it before using it. Put one end into a vice and pull from the other end with pliers, you will feel the lead give. Then you have to open up each side of the lead so that it will take the thickness of the glass. Use either a special stopping knife for this or an old blunt kitchen one. You will also need a lead cutting knife, you can make your own if you wish from an old knife cut off short and sharpened across the blade so that it will cut downwards.

Work Systematically

Work on your leading on an old wooden board. The paper cutline should be placed on it under the glass as your guide. Start at one side with a lead and slot in the glass pieces, systematically moving across the design, cutting the lead where necessary. Tap the glass pieces into the lead as tightly as possible with the lead-weighted handle of the stopping knife or with a light hammer. You will find that it is helpful to use nails tapped into the wood, braced against the glass, to hold a piece temporarily in place until you are ready to cope with it by fixing it into the lead.

Soldering the Lead Together

When you have assembled the whole panel, you must solder the joints in the lead cames. Prepare each joint by cleaning thoroughly with a wire brush until it is bright, the surface must be absolutely clean if the soldering is to work. Then rub a little tallow on to the joint to act as flux.
Lead solder melts quite easily but you must nevertheless have a good soldering iron that gets hot enough for the lead and solder to fuse thoroughly. A gas soldering iron is satisfactory but the flame means that there is some risk to the glass. It is therefore best to use an electric iron of 80 watts with a 1/4" bit.
The copper bit must be prepared before you use it each time. File it clean. Then heat the iron and rub tallow on the bit as flux. Melt a little solder on it and rub it on an old tin can lid until the bit is coated smoothly all over.
You are now ready to solder the joints. Feed in a strip of solder on to the joint with one hand while you press down on it with the hot iron held in your other hand as shown in the picture. Press down until you have produced a melted puddle of lead, but use no more solder than is necessary. When you have finished all the soldering on the top surface, turn the whole panel over and repeat the process on the other side.

Grouting

Grouting is the last major process in leaded stained glass work. Putty is worked thoroughly into all the gaps in the lead on both sides. It serves two purposes, it weatherproofs the panel and it prevents it rattling. You can either use proprietary metal glazing putty, which you must darken with black powder color or you can make your own from these ingredients:
3 Parts Whiting
1 Part Plaster
Black Powder Color to Darken
Linseed Oil to Bind
Turpentine to Soften
Mix this thoroughly and work it firmly into the gaps with a brush, an old nailbrush or toothbrush would do well. Crumple a piece of newspaper into a ball and use it to scour the surfaces clean when you have finished with the grouting. Finish off by polishing with a soft cloth; you may need to wipe the glass over with a little turpentine for a perfect finish.
This concludes my hub on the basic techniques and principles of creating your own stained glass projects. I hope you have enjoyed learning the steps involved. Remember when starting any new craft that practice is always a good idea and start small. Once you gain confidence in your abilities, the possibilities become endless.
Thanks for stopping by & Happy Crafting!


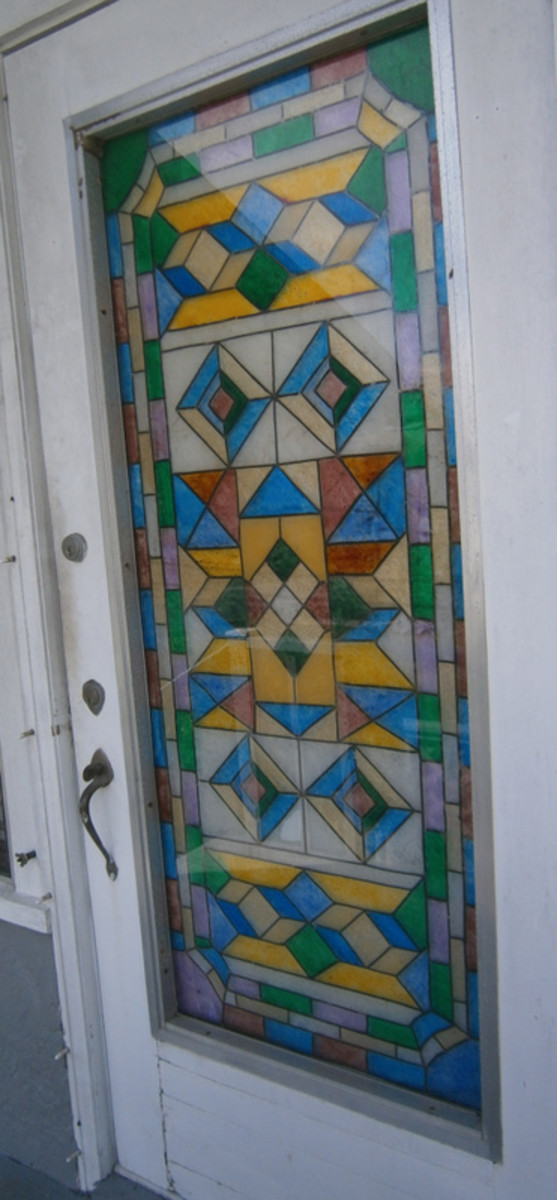
How To Faux Stained Glass Windows and Doors To Look Like The Real Thing! Instructions and Photos

I love the look of stain glass, especailly in old Victorian houses. I live in a house that is over 100 years old. I moved and restored my house in 1984, and I have been busy ever since. I am always looking around at ways to improve my old house. The name of my old house is the Dolphin House. It was one of several guest houses that were to be demolished. I purchased the house at public auction and had it moved to its present location. I have been busy ever since restoring and improving the house. I invite you to take a look at the two Hubs I wrote about moving and restoring my old house. The links will be found at the bottom of this Hub.

The Professional's Stain Glass Door

Source

My Professionally Done Stain Glass Door

I hired a professional stain glass artist to make a stain glass dolphin for the front door. I was very pleased with that. I began looking around the house to other places for stain glass such as windows and doors, but I knew I couldn’t afford a professional to make those. Then I discovered a way to do it myself! People come into my house and always comment on my beautiful stain glass. I don’t tell them I did it myself. I first tried this technique on a mirror. I was so pleased with the mirror, I decided to do my bathroom window. Next, I painted two full sized plain exterior doors and my kitchen door window pane.

Go To Craft Store And Get Supplies

I hope I have got you excited about doing faux stain glass for yourself. If so, go to a large craft store like Michael’s. You can find books filled with ideas for your project. These books have patterns and instructions for different brands of glass paint. They will give you a list of the paints and the amount you will need for whatever project you want to do.

Supplies Can Be Ordered From Amazon

If you can't find the supplies to do this project locally they can be ordered directly from Amazon. You'll need the assorted colors of paint and the black leading paint.

Plaid Gallery Glass Window Color Paint Set

My First Project

I'm Ready To Faux Stain Glass A Mirror

I decided to start learning this technique on a bathroom mirror. I would advise you to start out with a mirror because you can lay it down flat to work on it. After you have some confidence in using this technique of faux stain glass, you will be able to do larger projects such as doors and windows that will be vertical.
I cleaned the mirror well with alcohol.
I drew a pattern on the mirror using a scalloped design with a black marker.
Using the liquid leading paint, I went over the lines I made with the marker.
Wait about eight hours until the liquid leading paint has completely dried.
I filled in the lines with the liquid glass paint to get a solid white design.

The Kitchen Door After The Faux Stain Glass


I Did Faux Stain Glass On The Kitchen Door

My kitchen door had a plain glass panel on the top. Using one of the the designs in the book I bought, I created this faux stain glass. It turned out so well, I was encouraged to tackle the two full sized exterior doors.
When you are working on exterior windows and doors, place the pattern on the outside of the window holding it in place with masking tape. Using the pattern as a guide, draw the outlines of the pattern with the leading liquid (you would have purchased this along with the paints). Wait about 8 hours, then fill in with the colors of the glass paint.

Design Of The Bottom Kitchen Door Window


My Bathroom Window After Faux Glass Paint

I wanted light to come into my bathroom without sacrificing privacy. Instead of putting up curtains that would have prevented light from coming in, I did the faux glass paint technique on the window. It's a double hung window, so I did the upper and the lower glass window.

The Dining Room Door After I Did Faux Stain Glass

I think this is my favorite design using the Faux Stain Glass technique. It looks just like real stain glass. I get many compliments on this work of art.

Dining Room Door After Faux Stain Glass

My Daughter's Door After She Faux Stain Glass Painted It

My Daughter loved the work I had done so far so she asked if she could do her bedroom exterior door using the same technique. She designed this entire project and completed the work herself. She was so proud of the way it looked when she finished. I was too!

My Daughter's Door She Designed And Painted With Faux Stain Glass

Source

Make Faux Stain Glass Clings For Windows And Other Glass Objects

You will find instructions in the books on Glass Painting to make Clings to apply to glass. This method is nice if you want to decorate objects such as flower vases. They can also be used to decorate your windows for seasons such as Christmas, Easter, Halloween, etc. These are made on a special work surface using the liquid leading outline and the colors of the glass paint. When they are completely dry, you just peel off the "cling" and apply it to the glass. These "clings" come off easily when you want to take them off.

I'm Glad I Discovered Faux Stain Glass

This is one of those projects that you don't have to finish in a day! You can just work on it whenever you are in the mood. Go away and leave it alone, and start back up when you want to.
Always start with a clean window that you are going to paint on. Alcohol seems to work the best. This glass paint can be removed from your window or door if you get tired of that design and want a change, or if you just want to go back to plain glass. I don't think you would ever go back to plain glass, but if you do: Use a single edge razor to peel the design off the glass.
There is no need to put any kind of sealant on your work when you finish.
This is a project that I have really enjoyed learning how to do. It is so rewarding after you finish and your work looks like a professional artist did the real stain glass. I get so many compliments on my work. People really admire my stain glass, and I never tell them it's "faux" stain glass!

Video on Using Faux Glass Paint By Plaid Products

Exquisite Stained Glass Window a Decorators Delight

Stained Glass Window Beginning to Present Time

There is nothing more beautiful in a room than a stained glass window with the sun shining through,and it seems to bounce the colors as they dance off the glass. In Western Europe the stained glass window constituted the major form of pictorial art that has survived.
The purpose of the window is not to allow people to see outside, or even to admit light, but rather to control it. A stained glass window has been described as figurative; as if man incorporate narratives drawn from the Bible, history or literature. Sometimes they represent patrons or saints. Other times they use symbolic motifs.
During the Renaissance for 300 years stained glass windows were painted, thus traditional stained glass skills were lost. Luckily many of the older windows in cathedrals lasted for centuries. There were several artists using the stained glass with the white paint method during these years, with some events outstanding in history. The innate beauty of true stained glass was forgotten for a time.

Man of Sorrows and Saints

Stained Glass 1300-1480

Saint Louis IX of France (1226-1270), the King, and considered a Saint even during his lifetime. Following his death, 400 people gathered at Saint-Denis to testify to his sanctity. There in the abbey, the Chapel of Saint-Louis was dedicated. Two Grisaille Panels were placed in the chapel. They were made of pot-metal and white glass with silver stain.
Saint Louis built churches and many religious houses in his reign. His royal chapel on the Ile de la Cite in Paris was built to enshrine the relics of Christ’s Passion, which was consecrated on April 26, 1246. It contained a shrine for the Crown of Thorns and a fragment of the True Cross purchased from Emperor Baldwin II of the Latin Empire of Constantinople for the exorbitant sum of 135,00 livres.
In 1480, Marer dolorosa created The Man of Sorrows and the Mater dolorosa, in Strassburger, Werkstattgemeinschaft, Germany was again completed using pot metal and vitreous painting. Peter Hemmel von Andlau and a loose assembly of glass painters in his workshop were commissioned by the dean and chapter of Constance Cathedral to glaze the chapter house. Of the original eighty-one panels, only nineteen have survived.
The Hemmel style has delicately modeled features of the figures round, fleshy face with the exuberance of the drapery in broad planes.

The Adoration of the Magi

Stained Glass - The Cloisters in NYC

Another beautiful piece of stained glass is now located at The Cloisters (in NYC) and titled Theodosius Arrives at Ephesus”, which was made in Rome about 1200 AD. This scene is straight out of the book of Ephesians in the Bible.
The Man of Sorrows and Theodosius Arrives in Ephesus are presently housed in The Cloisters, which I was fortunate enough to visit in NYC about six years ago. These are just a few of the old master pieces from the Renaissance era.
During the Victorian and Edwardian eras of the 1800’s, stained glass began to be used in non-religious windows of European chateaus. They still only used cathedral type glass, which is a smooth textured glass of various colors. The colors began to change for the traditional bright colors to the soft colors, which were really more appropriate for domestic windows. Stained glass made a major advance in the late 1800's and early 1900s during the Art Nouveau period, when American glass makers expanded upon the European cathedral glass by making a translucent "milky" glass known as opalescent glass. Many sub-types of glass have been developed since that time. In America, stained glass became very popular in the 1960’s and 1970’s. And, as we move forward we are seeing new styles and designs.

Church Stained Glass Window

St. Patrick's Cathedral in New York City

Source

Ceiling of St. Patrick's Cathedral

Some of the outstanding work for more recent artist includes the roof and stained glass of St. Patrick’s Cathedral in New York City. The artists of St. Patrick’s Cathedral are Chartres of France and Birmingham, of England and Boston, Massachusetts. They will not allow you to bring in a tripod for pictures but you may sit in a pew and aim your camera straight up. That's better than no picture at all.

Beautiful Stained Glass Window

Source

Louis Comfort Tiffany- Expert Craftsman

You certainly would have to include Louis Comfort Tiffany. (1848-1933), born in NYC. He was a U.S. painter, craftsman, philanthropist, decorator, and designer and the son of the famous jeweler Charles Louis Tiffany. He studied painting with American painter George Inness in Paris.
He was a recognized painter before he began to experiment with stained glass in 1875. He founded a glass making factory in Queens, N.Y., in 1878. There he developed an iridescent glass he called Favrile, which achieved widespread popularity in Europe. After 1900 Tiffany's firm ventured into lamps, jewelry, pottery, and bibelots. He is internationally recognized as one of the greatest forces of the Art Nouveau. One of his numerous designs is as breathtaking as the next. He is truly an artist that I adore.

Yale University

Wood Framed Stained Glass Window

Frank Lloyd Wright Lighting Lamp

Frank Lloyd Wright

No discussion of recent stained glass and design would be complete without mentioning Frank Lloyd Wright and the huge influence he had on modern design. There is a Frank Lloyd Wright foundation, that displaces his unique designs.
He was born in Richmond Center, Wisconsin (1867-1959), and his dream was to become an architect. He didn’t finish high school but went to work for the Dean of Wisconsin’s Engineering Department.
He completed two year of civil engineering before relocating to Chicago. He worked with architect Joseph Lyman Silsbee and drafted construction on his first building, the Lloyd-Jones family chapel.
He believed that buildings should move away from European design, and he based his work on American functions. He designed more than 1,000 projects which resulted in 500 completed works. He was very innovative with types of design; material used and promoted organic architecture.
He designed interior elements of his architectural projects, as well as, working with stained glass. He tended to use linear designs uniquely different from ones of scenes, people or flowers, I could fill up pages with his numerous designs.
The stained glass windows are loved by many and are frequently used in front doors and in the window beside the front door with a popularity that is certainly not waning.

In Summary

From the Renaissance when glass was painted to modern times, leaded glass has been used in beautiful cathedrals and in people's homes.
If you have an opportunity to see some of Frank Lloyd Wright's work it is stunning and different from what was done in ancient times. Wherever you travel try to visit older cathedrals, and you are usually in for a treat with the spendid beauty of stained glass.
The copyright, renewed in 2018, for this article is owned by Pamela Oglesby. Permission to republish this article in print or online must be granted by the author in writing.